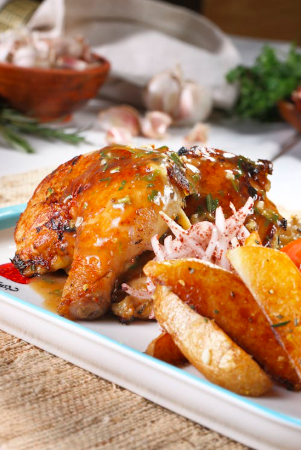
🍯 Honey Garlic Chicken
If you’re looking for a dish that’s sweet, savory, sticky, and deeply satisfying, honey garlic chicken is a classic that never disappoints. This version is designed to be easy enough for beginners, but packed with restaurant-level flavor thanks to a few smart techniques and flavor-building tips.
⏱️ Preparation Time & Servings
- Prep Time: 15 minutes
- Cooking Time: 20–25 minutes
- Total Time: ~40 minutes
- Serving Size: 4 servings
🛒 Ingredients You Will Need
For the Chicken:
- 500g (1 lb) boneless chicken thighs or breasts (cut into bite-sized pieces)
- ½ cup cornstarch
- 2 eggs (beaten)
- Salt and pepper (to taste)
- Oil for frying (vegetable or canola)
For the Honey Garlic Sauce:
- ⅓ cup honey
- 4–5 cloves garlic (finely minced)
- ¼ cup soy sauce
- 2 tbsp ketchup (adds depth and color)
- 1 tbsp rice vinegar or apple cider vinegar
- 1 tbsp brown sugar (optional for extra richness)
- 1 tsp sesame oil
- ½ tsp chili flakes (optional, for heat)
- 1 tbsp cornstarch + 2 tbsp water (slurry for thickening)
Garnish (Optional but recommended):
- Sesame seeds
- Chopped green onions
🔪 Step-by-Step Method
Step 1: Prepare the Chicken
Start by patting the chicken dry with paper towels. This helps the coating stick better.
Season lightly with salt and pepper.
Set up a simple coating station:
- Bowl 1: beaten eggs
- Bowl 2: cornstarch
Dip each piece of chicken into the egg, then coat thoroughly in cornstarch. Shake off excess.
👉 Tip: Cornstarch gives a crispier texture than flour.
Step 2: Fry the Chicken
Heat oil in a deep pan or skillet over medium-high heat (about 175°C / 350°F).
Fry the chicken in batches for 4–5 minutes until golden and crispy.
Remove and place on paper towels to drain excess oil.
👉 Pro Tip: Don’t overcrowd the pan — it lowers oil temperature and makes chicken soggy.
Step 3: Make the Honey Garlic Sauce
In a separate pan or wok, heat a small amount of oil over medium heat.
Add minced garlic and sauté for about 30 seconds until fragrant (not burnt).
Add:
- Honey
- Soy sauce
- Ketchup
- Vinegar
- Brown sugar (optional)
- Chili flakes
Stir well and let it simmer for 2–3 minutes.
Step 4: Thicken the Sauce
Add the cornstarch slurry (cornstarch + water mixture) into the sauce.
Stir continuously until the sauce thickens into a glossy, sticky consistency.
👉 It should coat the back of a spoon.
Step 5: Combine Chicken and Sauce
Add the crispy chicken into the sauce.
Toss well to coat every piece evenly.
Cook for another 2–3 minutes so the chicken absorbs the flavor.
Step 6: Garnish and Serve
Sprinkle sesame seeds and chopped green onions on top.
Serve hot with:
- Steamed rice
- Fried rice
- Noodles
🌟 Why This Recipe Is Special
This isn’t just any honey garlic chicken. Here’s what makes it stand out:
1. Perfect Texture Balance
You get crispy chicken on the outside and juicy tenderness inside — thanks to the egg + cornstarch coating.
2. Layered Flavor Profile
Instead of just sweet garlic sauce, this recipe adds:
- Tanginess (vinegar)
- Depth (ketchup + soy sauce)
- Optional heat (chili flakes)
3. Restaurant-Style Glossy Sauce
The cornstarch slurry creates that iconic thick, shiny coating you see in takeout dishes.
4. Customizable Heat & Sweetness
You can easily adjust:
- More honey → sweeter
- More chili flakes → spicier
- More soy sauce → saltier
🍳 Extra Tips for Better Taste
🔥 1. Use Chicken Thighs for Juiciness
Chicken thighs stay more tender and flavorful than breasts, especially when frying.
🧄 2. Don’t Burn the Garlic
Garlic cooks fast. Burnt garlic = bitter sauce. Keep heat moderate.
🥄 3. Double Fry for Extra Crispiness
For ultra crispy chicken:
- Fry once → rest 5 minutes
- Fry again for 2 minutes
This is a restaurant trick.
🍯 4. Use Good Quality Honey
The flavor of honey really shines here. Try:
- Raw honey → deeper flavor
- Light honey → milder sweetness
🧂 5. Taste the Sauce Before Adding Chicken
Adjust balance:
- Too sweet? Add vinegar
- Too salty? Add a bit more honey
- Too thick? Add water
🥢 6. Add Vegetables for Variety
You can toss in:
- Bell peppers
- Broccoli
- Snap peas
Cook them briefly before adding the sauce.
🥗 Nutrition Details (Approximate per serving)
- Calories: 420–480 kcal
- Protein: 25–30g
- Carbohydrates: 35–40g
- Fat: 18–22g
- Sugar: 18–22g
- Sodium: Moderate to high (depends on soy sauce)
👉 To make it healthier:
- Use air fryer instead of deep frying
- Reduce honey slightly
- Use low-sodium soy sauce
❓ FAQs
1. Can I bake or air fry the chicken instead?
Yes!
Air Fryer:
- Cook at 200°C (400°F) for 12–15 minutes
- Spray lightly with oil
Oven:
- Bake at 220°C (425°F) for 20–25 minutes
👉 Texture won’t be as crispy as frying, but still delicious.
2. Can I make this ahead of time?
You can:
- Fry the chicken ahead
- Store separately from sauce
Reheat and toss in sauce before serving for best texture.
3. How do I store leftovers?
- Refrigerate in airtight container for up to 3 days
- Reheat in pan or air fryer (microwave softens coating)
4. Can I make it gluten-free?
Yes:
- Use gluten-free soy sauce (tamari)
- Ensure ketchup is gluten-free
5. Why is my sauce too thin?
You may need:
- More cornstarch slurry
- Longer simmer time
6. Why is my chicken not crispy?
Common reasons:
- Oil not hot enough
- Overcrowding pan
- Too much moisture on chicken
7. Can I use pre-cooked chicken?
Yes, but:
- Crisp it in a pan or oven first
- Then coat with sauce
💡 Unique Variations to Try
🍊 Honey Garlic Orange Chicken
Add fresh orange juice and zest for a citrus twist.
🌶️ Spicy Honey Garlic Chicken
Add:
- Sriracha
- Chili paste
🧈 Butter Honey Garlic Chicken
Add a tablespoon of butter at the end for richness.
🥜 Honey Garlic Peanut Chicken
Stir in a spoon of peanut butter for a nutty flavor.
🧠 Final Thoughts
Honey garlic chicken is one of those dishes that feels indulgent but is surprisingly easy to make at home. The key lies in:
- Getting the chicken crispy
- Balancing the sauce flavors
- Timing everything properly
Once you master this, you can adapt it endlessly to suit your taste.